Clone Sources
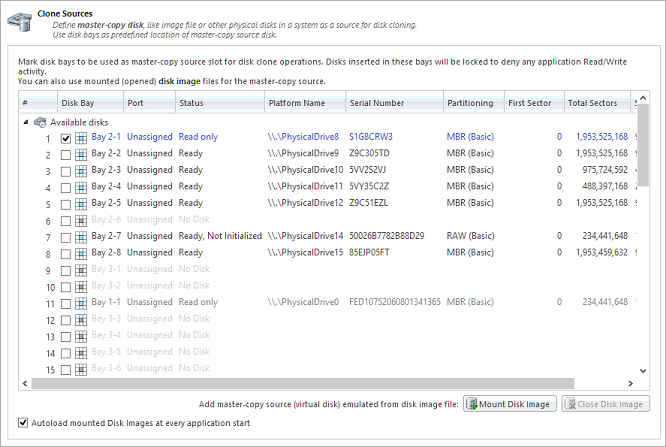
Clone Sources preferences section allows you to select a master-copy disk to use for cloning to other disks after they have been erased.
Select a Master Disk for Cloning
Any recognized physical disk can be used as a master-copy for cloning. Simply find the disk under the Disks Bays as clone sources and check the box next to the desired Disk Bay. This disk will be locked and read/write operations will be restricted until the cloning operation is complete.
Select a Disk Image for Cloning
Additionally to cloning a physical disk, cloning can be done for a disk image (raw disks' sectors stored in a single file or set of files) being mounted.
Supported raw disk images, disk images created by LSoft products (*.DIM), VMWare images (*.VMDK) and VirtualPC images (*.vhd).
To mount a disk image:
- At the bottom of the dialog, click Mount Disk Image button. Mount Disk Image dialog appears:
Figure 1: Mount Disk Image Dialog 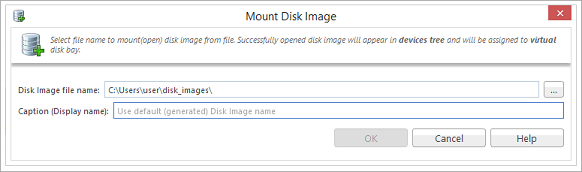
- Click the ... button to the right of the "Disk Image file name" field
- Find the desired disk image in the file explorer and click Open
- Fill in the "Display name" text box with a desired name for the image and click OK
- The mounted disk image should appear under Disk Images in the Master-copy sources window.
To avoid repeating steps 1-4 every time the application is launched check the "Autoload mounted Disk Images at every application start" box. This will complete the mounting process automatically in the future.