Examine Disk Physical Integrity
Disk examination feature is designed to scan disk's surface and determine physical integrity of the disk. Examine Disk step can be the preliminary step to Disk Erase, Disk Wipe or Disk Clone commands.
Examine Disk complete process is described below.
-
Select disks
Use mouse in Disk Explorer to select one or more physical disks. Selected disks displayed with orange borders.
For multiple selection use Ctrl+Left Mouse click.
To select all disks in a row, click particular numbered row header.
To select all disks in a column, click particular numbered column header.
To select all attached disks, press Ctrl+A.
Another way to select all disks is to click a rectangle at the top-left corner of the Disk Bays view.
Figure 1: Multiple Disk Selection 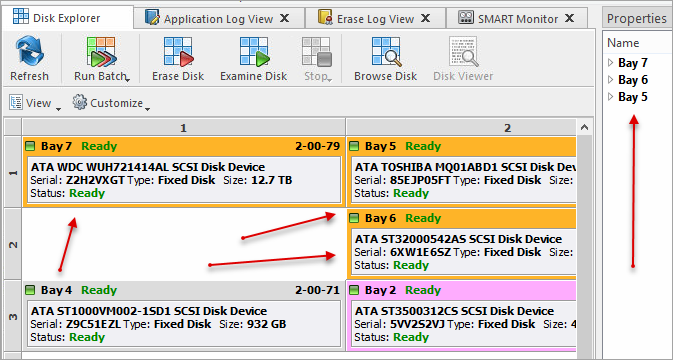
To select a particular partition or volume, click the object in the Local Devices view.
-
Start examination
Open Disk Examine configuration dialog using one of the following methods:
- Click the Examine Disk
 command on the action toolbar
 - Click command from main menu
- Click Examine Disk command from context menu
- Click command from toolbar or from Actions main menu to examine disks in predefined disk batch
- Click the Examine Disk
-
Confirm examination options
Confirm examination options after Disk Examine dialog pops up:
Figure 2: Disk Examine Options 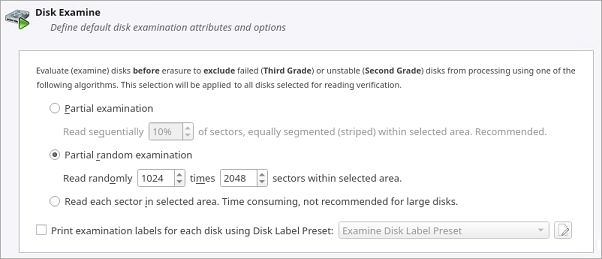
Use tabbed views to adjust examination options if necessary. Available options are:
Use Examine Grades tab in global preferences to specify disk grading attributes if necessary.
Note:If only one disk was selected for examination than you can specify boundaries of examined area for selected disk.
-
Observe progress
In the Disk Explorer you will see the progress of the examination in the slot of the drive being operated on. The process will be shown as a progress bar:
Figure 3: Examination Progress 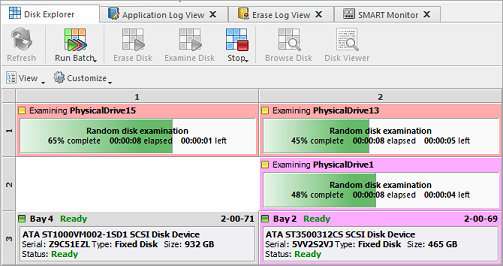
To cancel Disk Examination click Stopor Stop All toolbar buttons at any time.
As you see the green progress bar fills the virtual drive slot. The percentage of the examination completed and the estimated completion time will also be shown on top of the slot. Once the process is complete the phrase E X A M I N E D will flash on top of the slot.
When examination is completed user is able to review results (logs, processing reports and attributes) for processed disks and print Disk Labels.
