To clone a disk (or image to a disk) follow the steps below.
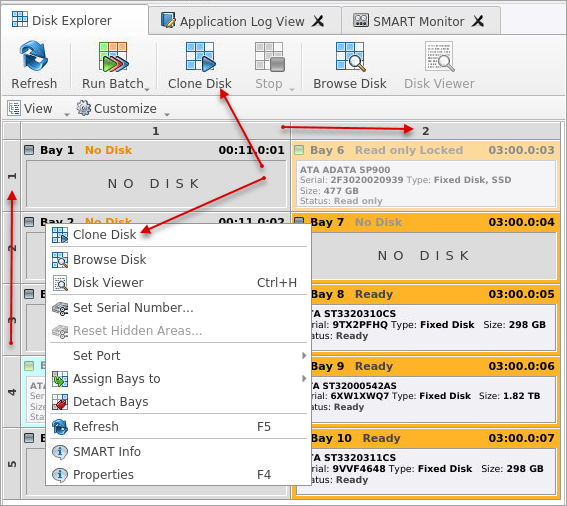
Select disk to clone
Navigate to the Disk Bays View and select a disk to clone. For multiple selection use Ctrl+Left
Mouse Click or row\column selection buttons. If none of drives is selected, the user must select the source
and targets on the next step.
Figure 1: Disk Bays View disk's selection
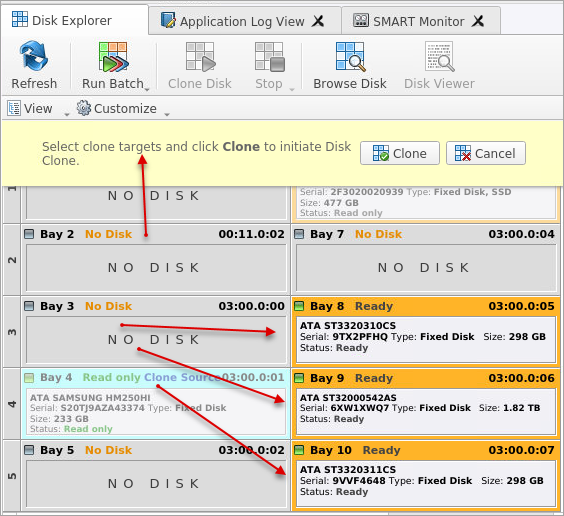
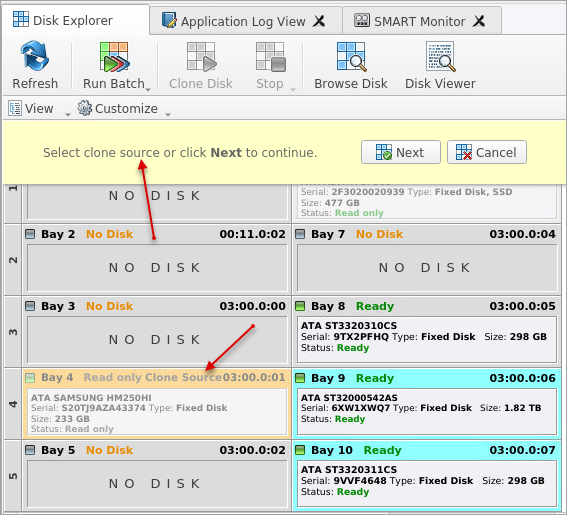
Click Clone Disk in main or context menus (Actions > Clone Disk as alternative) and select targets (if one disk was selected in previous step) or select source (if
multiple disks were selected) and click Clone.
Figure 2: Targets selection for cloningFigure 3: Source selection for cloning
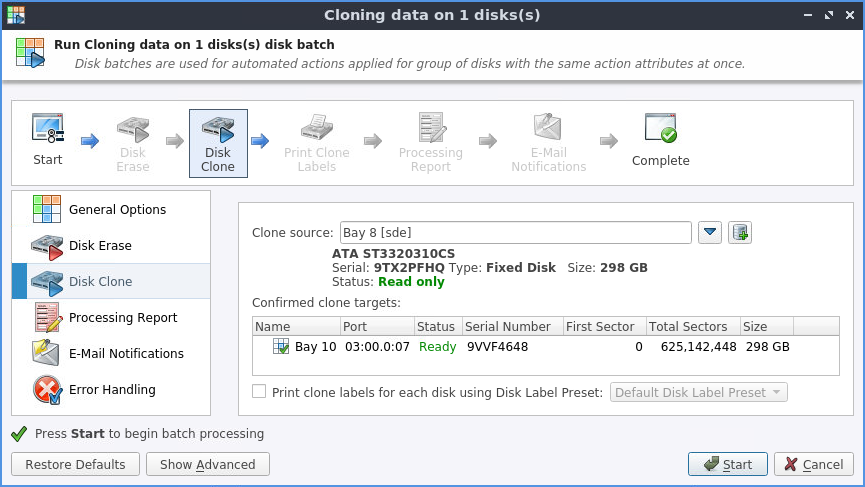
Next is the main work cycle settings' dialog. Available (configurable) options are:
Print clone labels for each disk using Disk Label Preset is an optional feature for providing a
specific label for each disk in work cycle according to presets.
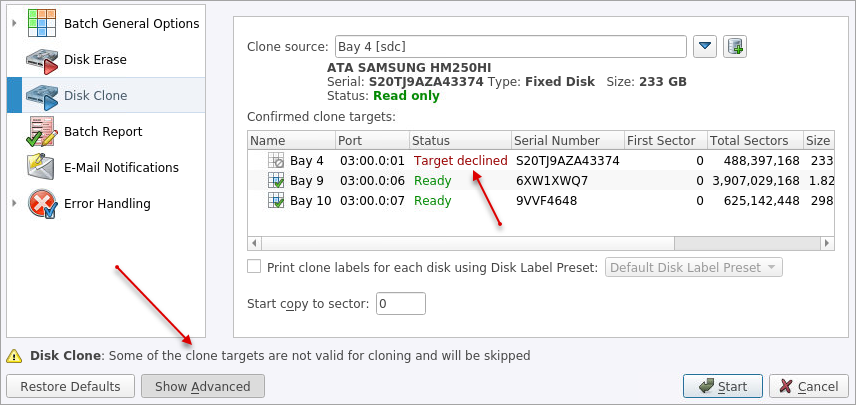
Note:Figure 5: Targets will be DECLINED if configuration is invalid
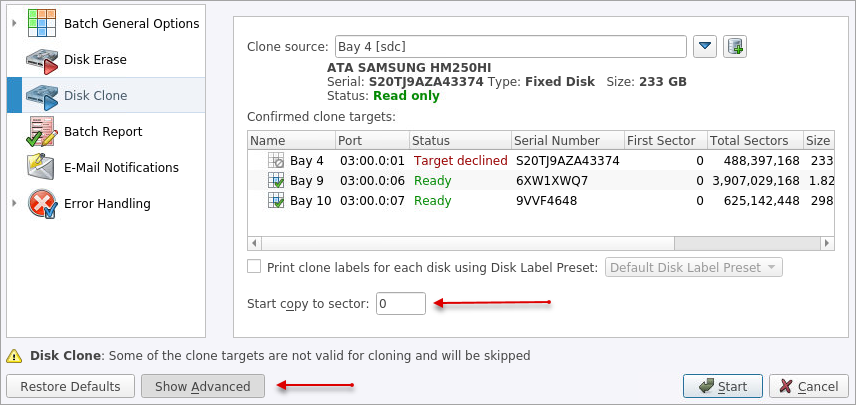
Start copy to sector stands for specifying a sector where the cloning starts and considered as a advanced
feature activated by pressing Show Advanced button:
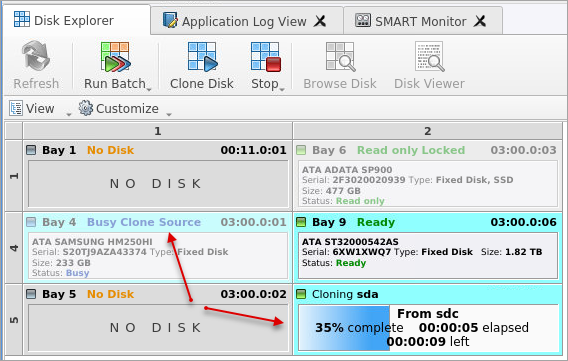
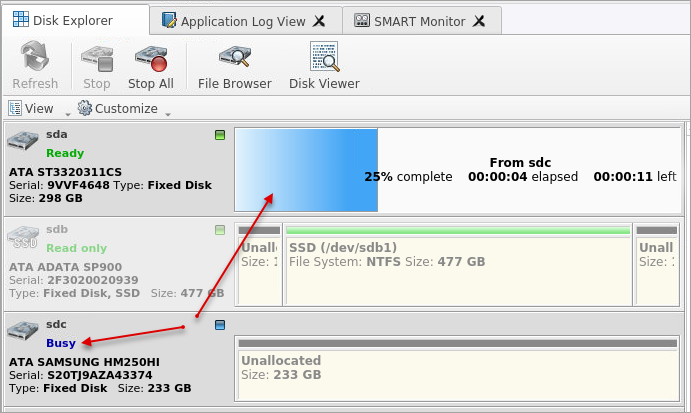
When all the settings are verified press Start button. The work cycle starts and user is able to see the
progress in Disk Bays and Local Devices Views. The progress bar represents the
percentage of disk space processed. As the procedure progresses the percentage increases and estimated time is recalculated.
Note: If preliminary Disk Erase procedure is configured and selected (activated), it starts first, right
before an actual cloning.
Figure 6: Disk Clone Progress (Local Devices & Disk Bays Views)
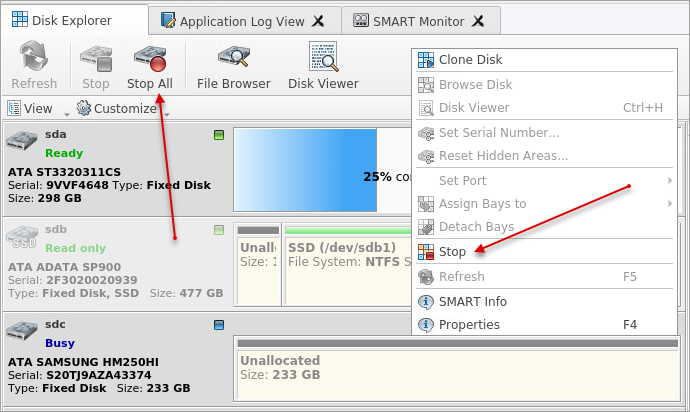
Figure 7: User is able to STOP the process at any time (main menus and context menu)
When the work cycle is succeeded (or failed) the Processing Summary dialog appears for reviewing and further
actions.
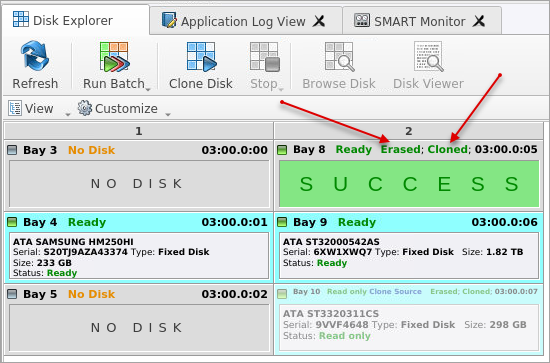
Figure 8: Disk Clone Success (Local Devices & Disk Bays Views)